| Info | ||
|---|---|---|
| ||
|
...
If you are experiencing any issues during signup, or have any questions, please email support@socastdigital.com who will be happy to guide you through the process. There are a lot of steps to go through, but we've tried to explain them as best as we can below:
Step-by-step guide
...
- A Google account
- A Google AdSense account
Step 1: Sign up for a Google Account.
...
- Visit the My ads tab.
- In the sidebar, select your product. For example, if you want to display ads on your website, select Content.
- Click +New ad unit.
- Give your ad unit a name. You can call this TEST for now.
- In the “Ad size” section, choose the size of the ads that you’d like to show - in this case, it can be any size.
- You can skip past the rest of the settings and siply click Save and get code.
Step 6: Add the test ad code to your site:
In the "Ad code" box that opens, copy all of that code to your clipboard, log into the SoCast platform and do the following:
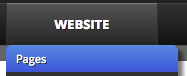
- Navigate to Website > Pages:
- Click on New Page:

- Call your page Test with a ton of random numbers at the end so that users can't access this page by guessing the URL - it needs to be published live, so the longer and stranger the name is, the better!

- Click on Add Widget, and create a Raw HTML Widget.

- Paste in the code that you just copied from AdSense exactly as it was, and click Save.
- Click Publish

- Copy your page name from the / onwards from the permalink section of the page to your clipboard

- Launch your website's homepage and paste the page name onto the end, so the address looks like this:
www.yourstationswebsite.com/test3472983472387423847239847/
- Launch the page. Now go back into your Google AdSense account to confirm that the ad has shown up and you've passed the second stage of signing up for an account!
NOTE: The URL needs to be the same as the one that you've set up for Google AdSense in STEP 2. If this site isn't live on the SoCast platform yet, this second stage of processing can't be passed until the site goes live.
Once your AdSense account is approved, you're able to take the final step of setting up AdManager:
Step 7: Setting up a Google AdManager account
In a browser where you're already signed in to the Google AdSense account you want to use, visit http://www.google.com/dfp/. Follow the prompts to verify your Google Account.
Select your display language.
Select your country or region, time zone, and default currency.
Confirm your local settings and accept the terms. Local settings are permanent once you've accepted the terms. Make sure you've got the right country or region, time zone, and currency.
That's it! You're now finally set up with Google AdManager.
...
| Page Properties | ||
|---|---|---|
| ||
|