Single Image Element
This Article Is For:
- All users who have access to one/all of the following: pages, blogs, contests, and sidebars
- This is applicable to: All themes
Tips:
- How To Optimize The Single Image element For Mobile Responsiveness: To make images look their best on mobile responsive devices, please select "large" as the image size instead of "thumbnail"
- The 'Single Image Widget' can upload Jpgs, Gifs and Pngs
Step-by-step guide
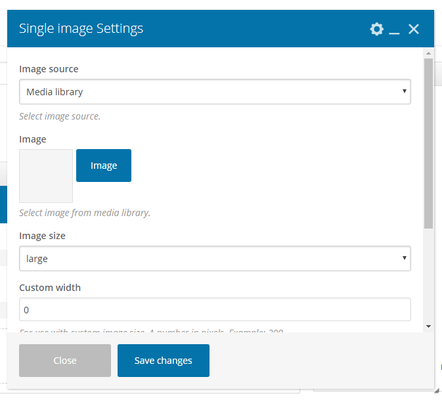
- Image Source: Choose 1 of the following:
- Media Library: Allows you to upload an image from the media library. If selecting this option please see steps: 2&3, 6-10
- External Link: Allows you to paste the image URL into the page or blog. If selecting this option please see steps: 4-10
- Image: Click on the 'image' button to upload an image from one of the following:
- From Computer: upload an image from your computer
- Media Library: choose an image already uploaded to the media library
- Stock Image: Select a stock image. For more information on stock images rules & use please see: Stock Image Library Overview
- Image Size: The image size will automatically default to 'large'. Although you can choose from any of the following:
- Thumbnail
- Medium
- Large
- Full
- Custom
- External Link: Add the image link/URL here
- Caption: If you want to add a caption to your image, add it here. It should display underneath the image
- Custom Width: For use with custom image size. A number in pixels. Example: 200
- Custom Height: For use with custom image size. A number in pixels. Example: 200
- Image Link: Enter url if you want to link this image with any url. Leave empty if you won't use it
- Link Target: Choose whether you want the image to open in the current window or a new window
- Click the Save button
Related articles