Custom Google Analytics Blog Category Report
This article is for advanced users/company admins
Website Settings Permission is needed
These instructions assume you've already created a Google Analytics account for your website. If you haven't done this yet, go here: https://support.google.com/analytics/answer/1008015?hl=en
This article is a reference tool only - for further support with Google Analytics please visit https://support.google.com/analytics/?hl=en#topic=3544906
If you'd like SoCast to perform this work as a one-time service for you, please contact support@socastdigital.com to request a Statement of Work.
Instructions
- Set up Google Analytics to track Blog Categories
- Sign into Google Analytics
- Click Admin in the left navigation
- Navigate to the property to which you want to add custom dimensions
- In the middle Property column, click Custom Definitions > Custom Dimensions
- Click New Custom Dimension
- In the Name field, type "Blog Category"
This can be any string, but use something unique so it’s not confused with any other dimension or metric in your reports. - Select the Scope
Choose to track at the Hit, Session, User, or Product level. Read more about scope and how custom dimensions are processed in the Developer Guide.
For the purpose of this report you will choose HIT however, you can opt to set up other reports as you see fit. - Check the Active box to start collecting data and see the dimension in your reports right away. To create the dimension but have it remain inactive, uncheck the box.
- Click Create
Note- If you have preexisting Custom Dimensions created in your account- the value indicated in the 'Index' column will represent the 'dimension_' indicated in the tracking code referenced below in Step #4 (example dimension1 )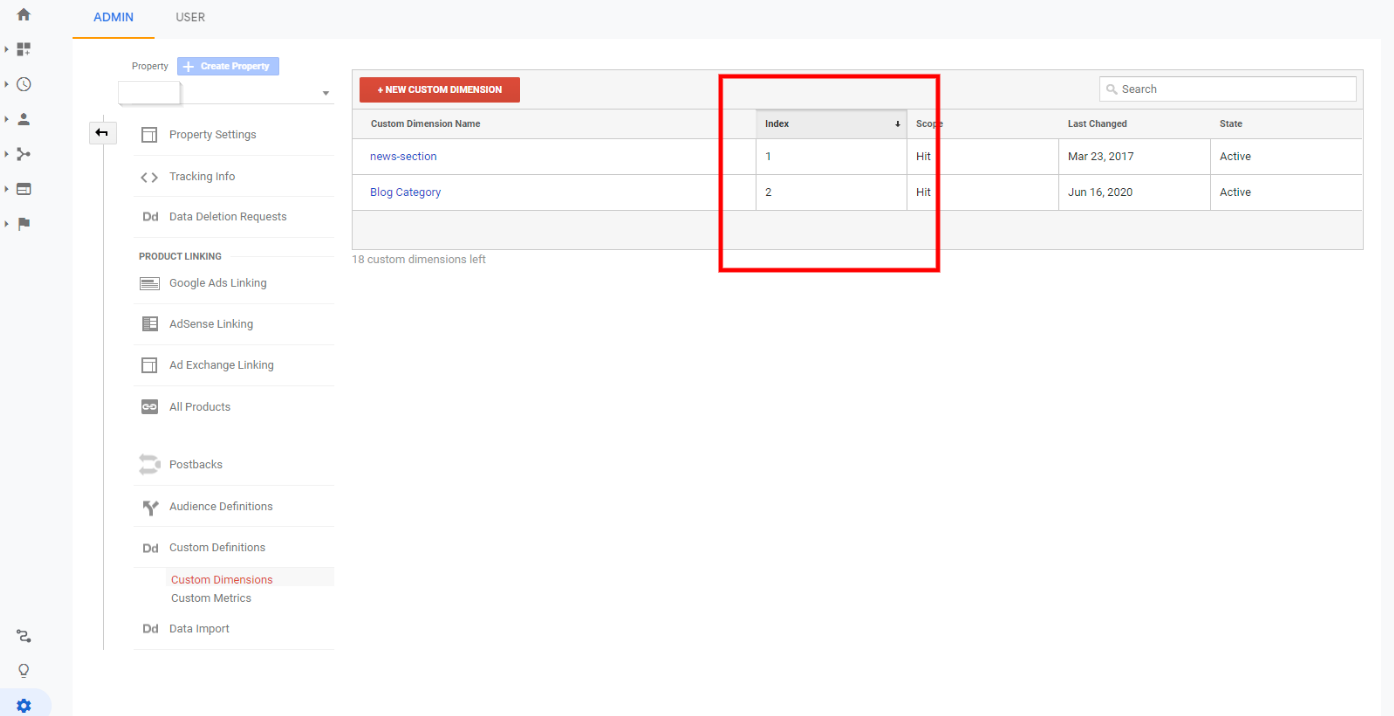
- Set up a Blog Category Tracking report in Google Analytics (for additional details, go here: https://support.google.com/analytics/answer/1151300?hl=en)
- Sign into Google Analytics
- Navigate to your view
- Open Reports
- Click Customization > Custom Reports > New Custom Report
- In the report Title field, type "Blog Categories"
- In the report tab Name field, type "Categories"
- In the report Type field, select "Explorer"
- In the Metrics Groups section, click Add Metric
- Search and add "Pageviews" and "Unique Pageviews"
Optionally add additional metrics - In the Dimensions Drilldown section, click Add Dimension
- Search and add "Blog Category" and then "Landing Page"
Optionally add additional dimensions - (Optional) In the Filters section, click Add Filter to limit the report to specific dimensions
- (Optional) In the Views section, select where this report should appear. Use the drop down menu to select specific views, or select "All views associated with this account" to allow this report on all views you have access to.
- Ensure fields are set up as the following:
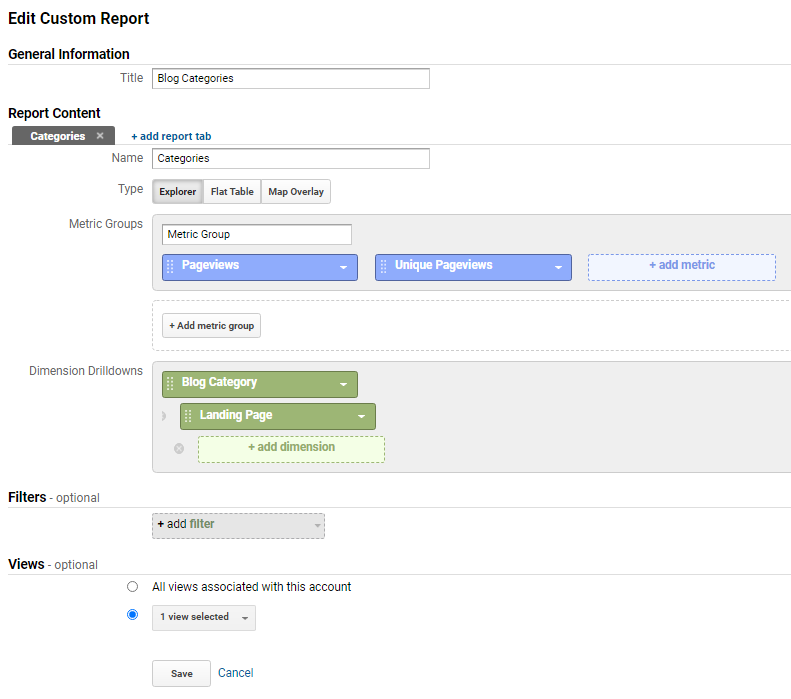
- Click Save
- Get your Google Analytics tracking code
- Sign into Google Analytics
- Click Admin in the left navigation
- Navigate to the property to which you want to add custom dimensions
- In the middle Property column, click Tracking Info > Tracking Code
- Copy the Tracking Code (e.g. UA-55555555-5)
- Set up Google Analytics in the SoCast Platform
- Sign into to the SoCast Admin Panel
- Click Website> Website Settings
- On the General tab, scroll down the Custom Footer HTML
- Paste the below code, into the Custom Footer HTML box
Replace GOOGLE_ANALYTICS_TRACKING_ID (two instances) to your specific Tracking Code for your website obtained from the previous step
Google Analytics Tracking Code<!-- Global site tag (gtag.js) - Google Analytics --> <script async src="https://www.googletagmanager.com/gtag/js?id=GOOGLE_ANALYTICS_TRACKING_ID"></script> <script> window.dataLayer = window.dataLayer || []; function gtag(){dataLayer.push(arguments);} gtag('js', new Date()); gtag('config', 'GOOGLE_ANALYTICS_TRACKING_ID', { "dimension1":"%socast.blog.categories%" }); </script>
- View your Blog Categories report
- Sign into Google Analytics
- Navigate to your view
- Open Reports
- Click Customization > Custom Reports > Blog Categories
Related articles